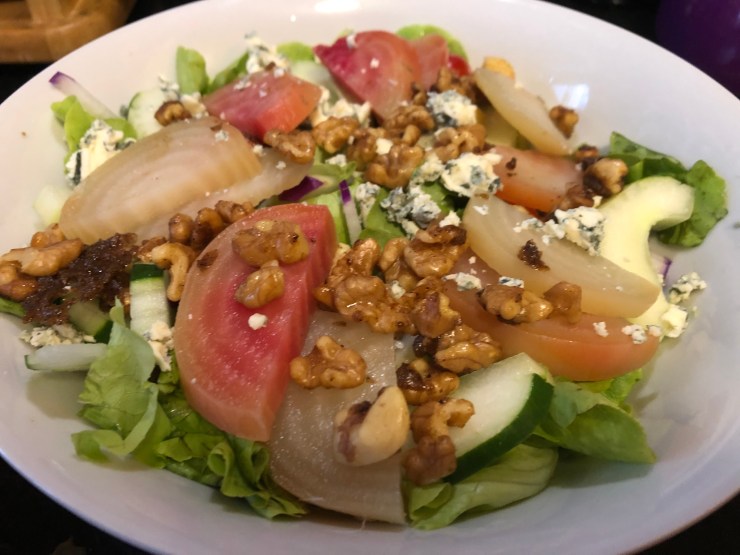
Candy Cane Beet Salad
So, it’s still a heat wave, a tropical heat wave. But at least there’s a breeze today. It’s a perfect day to make a light, crunchy salady dinner. So break out those pretty little beets you got at the Farmer’s Market and let’s make a sweet and savory Candy Cane Beet Salad.
These beets are super cool, because when you cook them and cut them open, they have red and white stripes, like a candy cane. Beets are also loaded with sugar, so if you like something a little sweet on a hot day, this is a healthy pick. So get your beets and either roast them or boil them, let them cool and peel and slice them up.

Then, get yourself some nice lettuce. I used light green Bibb lettuce with a little bit of garden-picked green and red lettuces mixed in. You use what you like. Arugula and romaine are great, too. So wash your lettuce and salad spin it, if that’s how you roll.
Next, peel and de-seed a cucumber, and slice that up. I like to leave strips of green on the cuke, and drag the tines of a fork along the peeled sides to make ridges. Because I like my shit a little bit fancy.
Toss in a few tomatoes and whatever else you like. I matchsticked a radish for a little extra crunch, and added some pre-made croutons for the same reason.

Then, I candied a handful of walnuts to toss on top. It’s easy! Put some raw walnuts in a tiny frying pan. Let them brown with a little oil—but keep a close watch, because nuts burn fast and then they’re ruined. Before these get too brown, toss in a handful of brown sugar, some salt, and a little chili powder. Shake the nuts all up in the sugar until it melts, then turn off the pan and let it cool.
Finally, I put it all together. Lettuce topped with cukes, tomatoes, radishes, croutons, a nice fanning out of beets, a handful of candied walnuts and a glorious shaking of gorgonzola cheese. I used aged cheddar for my better half, because she doesn’t go for stinky cheese.
Dress the salad with the store-bought dressing of your choice, or mix a quick vinaigrette with olive oil, cider vinegar, honey, Dijon mustard, salt and pepper and a zip of lemon juice. If this is your dinner salad and you want something more substantial, add some roast chicken on top for an easy protein boost.
Eat healthy, stay healthy, my friends. Be cool!
Scallops with Fennel and Orange
Fennel is such an exciting vegetable, with its big, green, celery-looking body, capped on the end by fronds of what look like dill. And to top it off, it tastes kind of like licorice. What the heck are you supposed to do with something like this?
I love licorice, and I love cooking, but before now, I’ve never really been able to get down with the wonders of fennel. The anise taste is too much for most people, and all those spindly fronds can be a lot to digest. But this weekend, I picked up some fennel in the Farmer’s Market and hit the Interwebs for some nice recipes. I cobbled two together and the result was delicious!
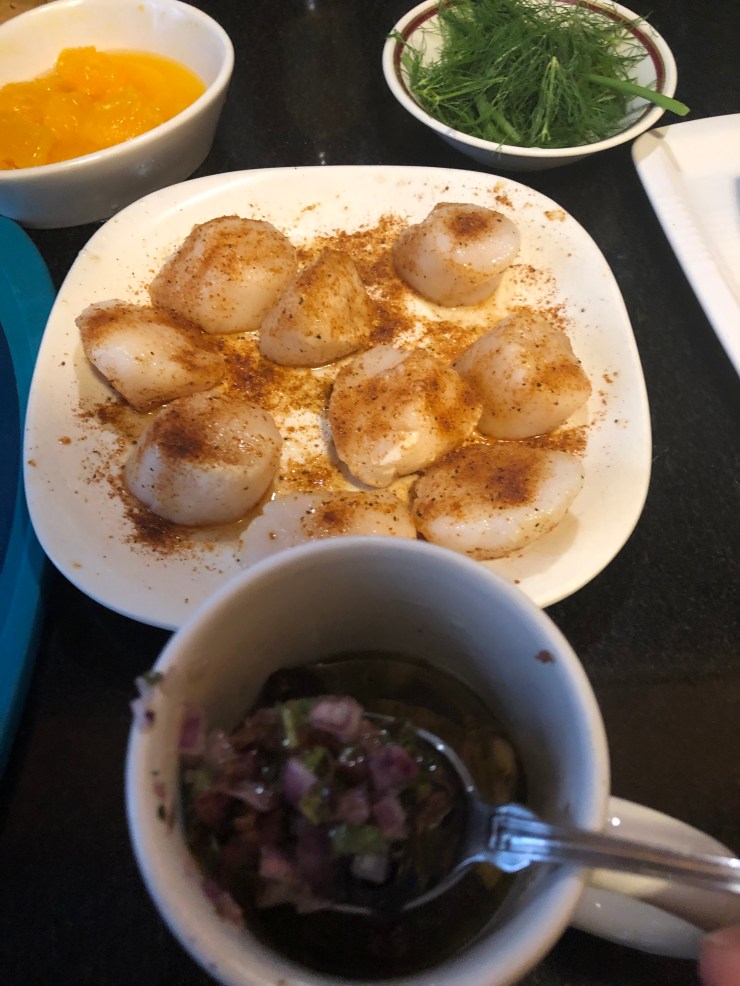
First, I got some nice frozen sea scallops out and moved them to a plate in the fridge to thaw slowly. About 3-5 large scallops per person makes a nice serving size. You should always thaw fish in the fridge, rather than leaving it out on the counter or under running water. That way it doesn’t fall to pieces. So this is me, slowly thawing two serving of scallops, then dusting them on each side with spicy Old Bay Seasoning.
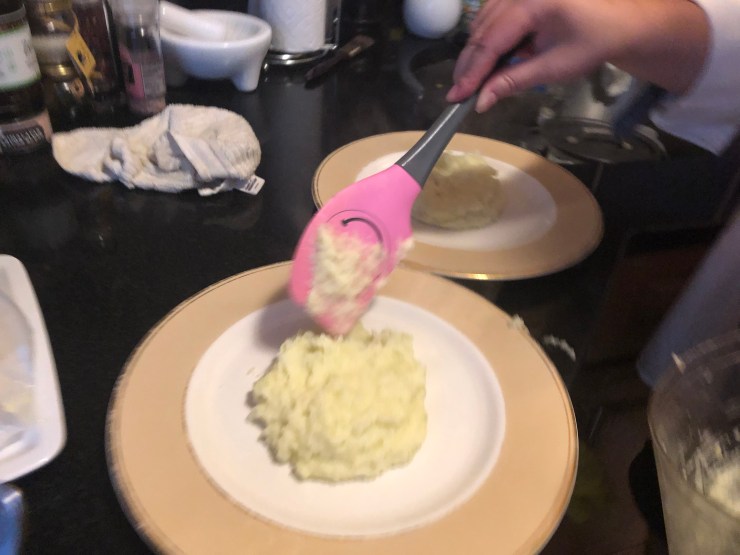
Next, get a pot of water boiling. Peel one large (or a few small) white potatoes, quarter them and put them in the pot. Then add the white bulb of the fennel, sliced into small pieces. Yes, you cook it. In a pot, with potatoes. When they’re fork-tender, drain them and run them through the food processor with 2 tbsp. of butter, 2 tsps. of salt, and a squeeze of lemon. It will look and taste like mashed potatoes when you’re done.
While the potatoes and fennel are still cooking, take two large oranges and cut the rind and pith completely off. Royal the orange segments out carefully by sliding a sharp knife along each side of the membrane until they drop out, all fruit, no pith. This process takes a while, so be patient; it’s the most difficult part of this dish.
Squeeze the leftover orange membranes and whatever’s left inside the rind to get a nice separate bowl of fresh juice. Add to it a drizzle of olive oil, a bit of honey, and some salt and pepper to make a light dressing.

Pit and chop about 10 black Kalamata olives, and add them to the orange segments. Take half the remaining fennel fronds and remove them from the stem, adding them to the bowl. Finely brunoise (dice) a shallot and add that to the bowl. When you’re done, dress the fresh ‘salad’ portion with the dressing and let it marinade while you cook the scallops.
Dry off your now-thawed scallops well with a paper towel. Make sure the adductor muscles (the tough little attachment on the side) have been removed, or peel them off yourself. In a large frying pan, heat up butter, bacon grease, or some combination of the two, to get a hot heat. Get the pan really hot, then carefully place your scallops in, turning them after one minute to get the other side crispy.

When both side are brown-black, take them off the heat and let them set while you prepare the plates. First, put a nice serving of the whipped potato/fennel mixture in the middle. Then, arrange the scallops on top in a ring. Carefully spoon over this the oranges, fennel, shallot and olives marinade on top. Add a dash of coarse salt, and it’s ready to eat.
Enjoy this delicious, light seafood dinner with someone you love! This is a good one to impress your family without too much work.
Tikka Masala and Palak Paneer
Let’s go for something spicy and satisfying today: a rich Indian feast that is half homemade, half Trader Joe’s premade frozen entrée. When you taste the end result, you won’t mind the work.

So let’s start by gathering up our supplies. For the Tikka Masala, you’ll need two chicken thighs or breasts, or the equivalent of boneless chicken. Gather a collection of Indian spices: curry, garam masala, turmeric, cumin, chili powder and Kashmiri chili or cayenne pepper powder. You’ll also need tomato sauce or paste, heavy cream or whole milk, garlic, onion, ginger, brown sugar, salt, yogurt, frozen peas, and some neutral oil.
In a bowl, combine 1 cup of yogurt with 2 tbsp. diced ginger and garlic, plus one tsp. of garam masala, turmeric, cumin, chili, and salt. Marinade the chicken in it for at least 10 minutes, or ideally, overnight.

Then, dice up one onion and sauté it in butter in a casserole pan, like a Dutch oven. When the onion is clear, add the chicken, with some of the marinade scraped off but reserved for later. When the chicken is browned on both sides, turn off the heat and set it aside.
Next, take your bowl of leftover chicken marinade and begin to add more ingredients to it, to make your sauce. Add a squirt of vegetable oil, and another round of all the spices you added to your marinade. Stir in 14 oz. of tomato paste or sauce, plus 1 tsp. of brown sugar. If the sauce is too thick, add a little water to thin it out.

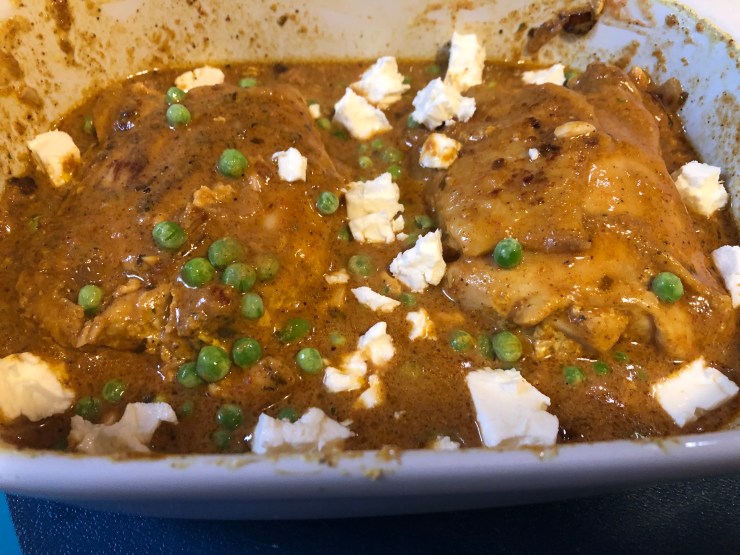
Combine the sauce and chicken in your Dutch oven, and stir together well. Add a handful of frozen peas and 1 ¼ cups of heavy cream or evaporate milk and stir again. Then, put it into a 375 degree oven for an hour to finish, until the meat is falling-apart tender.
When the meat is halfway done, stir it well so the dairy won’t split, and start a pot of basmati rice on your stovetop. I like to add a few cardamom pods to give it floral notes, but make sure you remove them before serving. They don’t taste good to bite into.

Also, put your frozen premade entrees into the oven. I chose a side dish of spinachy Palak Paneer, plus six Chicken Samosas as a side dish. They take about 25 minutes to cook. Turn them halfway through.
When your chicken and your spinach are cooked through, you’re ready for the last step: your flatbread. Heat up frozen naan or paratha bread according to the directions on the package, and serve that up with your Chicken Tikka Masala, Palak Paneer, Chicken Samosas and basmati rice. For a cocktail, I went full colonialism with a nice, crisp gin and tonic. It complements the spicy, savory Indian flavors extremely well.

Enjoy your Indian feast, and don’t skimp on that savory Masala sauce. Whether you slather it atop your chicken or dip your bread into it, you won’t want to waste a bit!
Meatball Subs
Hey gang! There’s a slight breeze in the air and I’m in the mood for something savory and spicy, but I don’t want to spend all evening in the kitchen. So today, we’ll make Meatball Subs, a quick and easy hump day recipe that you can start on the stovetop and finish in the oven (or toaster oven, if that’s how you roll.)
- INGREDIENTS
- Meatballs
- Italian bread
- Mozzarella
- Tomato sauce
- Ricotta (optional)
- Basil and oregano
- Olive Oil
- Garlic
First, get all your ingredients together. Make sure you get a nice, fresh loaf of crusty Italian bread; you don’t want to bite into stale, hard bread with your sub. Cut it lengthwise and in half, and cover it with a clove of diced garlic, a nice coating of olive oil, and diced herbs like basil and oregano.

Put it under the broiler or in a 400 degree oven for six minutes. In the meantime, heat a frying pan with neutral oil and cook up some frozen meatballs, about 14-16 should do it. I use Trader Joe’s frozen meatballs; they have regular and party size, available in beef or turkey. If you need or want to make your own meatballs, you should get on that way before you toast your bread. It’s basically meat, breadcrumbs, eggs and herbs, mixed, rolled and cooked up.
But we are opting for the pre-made meatballs, because this is a 10-minute dinner. So you’ll sizzle up your meatballs in the pan, and when they’re brown and toasty on all sides, add a cup of tomato sauce (jar sauce is A-OK) and put a lid on, so they get nice and hot and the insides cook all the way through for five more minutes.

Take your toasty bread out of the oven and if you like, give the bottom of each section a nice spoonful schmear of ricotta cheese. I mean, just if you have it hanging around and want to jazz up your sub. Skip it if you don’t, it’s fine.
Next, divide the meatballs in two portions, and carefully arrange equal amounts of meatballs and sauce on the bottom of each sub. Cover the meatballs with shredded mozzarella cheese, more herbs, and salt and pepper, then put it back in the oven for another six minutes, until the cheese is completely melted.

Pull it out of the oven before the bread gets too hard, and insert the flat of your chef’s knife into the crease to carefully fold each sub portion in half. Cut each half in half (or take it straight to the head as is) and serve it up with plenty of napkins to catch that savory, saucy sauce before it spills out and runs down your arm.
Enjoy the easy-peasy Meatball Sub, and be safe, friends!
Shrimp and Grits
Down South folks are wise to the fact that shrimp and grits is the con man of dinners: an easy scallywag assembly of basic items on hand posing as a bona-fide fancy entrée. Today we’ll see what it takes to make this delicious concoction come to life, and we’ll pair it with a nice Sazarac.
Grits: is it breakfast? Is it dinner? Could it be both? All of the answers are ‘yes.’ Grits are tiny bits of hominy corn that seem to have an inexhaustible ability to absorb water. Meaning a tiny bag of dry grits has the potential to turn into a huge amount of cooked grits.

For this dish, we’ll use some fancy Geechie Boy blue grits that I bought in Savannah, Georgia when we visited around Christmas. (Bye, Georgia. I’ll miss you. Sorry y’all don’t seem to have the good sense to stay indoors during a pandemic.) So measure out your water to your grits and start a pot bubbling, with some nice kosher salt. Pour the grits in slowly, and stir them the whole while, so they don’t stick together.
Then, in another pan, fry some cut-up bacon or if you really are Southern, some nice shelf-stable pork fatback you got from Stuckey’s or The Border Station. When it’s nearly done, add some shallots, onion, or scallion and some chopped celery, and stir around. Toss in some pepper (I used pickled jalapeños), and deglaze the mix with a little beer or chicken stock.

Thaw some frozen shrimp (or use fresh if you can find it) and dust them all over with Old Bay Seasoning, or whatever spice mix is its closest facsimile and is currently in your house. Put your shrimp in the hot pan and cook quickly and thoroughly, turning to make sure both sides of each shrimp are cooked. When they are done, squirt lemon juice on top of them to deglaze, scrape the pan and take it off the heat.
Now we’ll finish up the grits. Taste them and add more salt, if necessary. Add onion powder and butter to the grits, and stir them well. If you like, you can add milk and shredded cheddar cheese to your grits as well. I’m going to skip this step, because these Geechie Boy grits are a popping blue color, and they can turn a weird shade of purple with too much dairy. But adding cheese to grits is a time-honored tradition, and works great especially for breakfast grits.

Let’s put all of these components together now. First, put the grits into two deep bowls. Next, carefully divide the shrimp between the two bowls, in a nice circle. In the middle of each circle, divide the cooked mélange of bacon, celery, onions and herbs. Then, top each bowl with parsley and chives, cut into small bits with kitchen shears. Dust each bowl with a little course salt, and serve.
I had my grits with a Sazerac, helpfully prescribed by the fabulous Justin Vivian Bond, who does a live cocktail mixing every Thursday night. The Sazarac is a traditional New Orleans-style rye whiskey cocktail, with two types of bitters, a healthy pour of rye, some muddled sugar, and loads of ice for shaking. You’re supposed to coat your cocktail glass with absinthe, but I only had Galliano, so I used that and it was amazing, with little more than a maraschino cherry garnish.

So if you’ve got a little bit of this, some of that, and a few shrimp lying around in your freezer, shrimp and grits is a beautiful and filling dish that will make you feel like you’re having a fancy dinner out, right in your own house. And that’s great. Because right now, your house is the only restaurant that’s open.
Be safe, have fun, and laissez les bons temps rouler!
Eggplant Parmesan
Meat’s being gross right now, so let’s go all in on veggies. Who’s ready for some eggplant parm?
I used to make my eggplant parm with the skin on, in a flat baking pan with each piece as a stand-alone island. Until I had my wife’s mother’s parm, may she rest in peace, and began doing it her way. She peels the entire eggplant first, so there’s no chewy black skin, then salts it, then fries it and stacks it all together in layers, like a lasagna. It’s a lot tastier and a lot easier to make.

So first, get yourself a nice eggplant. Did you know there are female and male eggplants? And the males have a lot less seeds, and are therefore less bitter? Well, it’s a fact, except maybe not exactly scientifically. Still, try and get male eggplants; look at the indentation on the bottom. If it’s a deep groove shaped like a dash—it’s a girl! If it’s shallow and round, it’s a male.
First, peel all the skin off your eggplant. Cut the stem off and cut it into uniform slices, about ½ inch thick. Arrange the pieces on a plate covered with paper towels, and salt each layer well. Put in the fridge for a few hours.

When you’re ready to cook them, take them out of the fridge. Get yourself two large, shallow bowls and a big frying pan and coat the bottom with a healthy pour of oil.
In one bowl, mix an egg and some milk to make an egg wash. In the other bowl, put either breadcrumbs, panko, or flour, depending on what you like to coat your fried eggplant with. I like Italian-flavored breadcrumbs. If you have regular breadcrumbs, feel free to ‘Italian’ them up with oregano, garlic salt, pepper, etc.

When your oil is medium-hot (don’t get it to smoking-hot), start breading your eggplant. Dip it into the egg wash and let all the egg drain off before you put it into your breadcrumbs or flour. Some people like to ‘double-dip,’ by coating the slices of eggplant in egg, then flour, then egg again, and then breadcrumbs. You do you; as for me, I don’t want all that breading.
Once the eggplant is breaded, ease it into the pan and repeat with the remaining pieces. Cook each piece for two or three minutes, then turn it over. Have a large Pyrex pan ready for these finished pieces. When you get the first batch done, do yourself a huge favor and use a paper towel to remove all the blackened breading from the pan before you add more oil and fry the next batch. Eggplant soaks up a lot of oil, so be judicious with your use.

While your second batch of eggplant is frying, start parming the pieces in your Pyrex dish. Put a big tablespoon of tomato sauce (jar sauce is fine) on top of each piece of cooked eggplant. Then when all the pieces are sauced, sprinkle mozzarella cheese on top of them. Add some herbs if you like.
Then you just repeat the process, moving more cooked eggplant into your Pyrex baking dish, adding more sauce, spreading more cheese. If you want to get fancy, feel free to add a tablespoon of ricotta cheese along with the tomato sauce to each piece of cooked eggplant, then top with mozzarella.

When your casserole is constructed, pop it into the oven on 350 degrees for about 25 minutes, until the cheese is brown and bubbly. While it’s finishing up, make yourself a pot of spaghetti or other pasta, and add sauce when it’s done. A nice salad and some garlic bread wouldn’t be out of the question. And don’t forget to pair it with a good stiff pour of red wine.
Abbondanza de cibo, amicis! Be safe, and andiamo a mangiare!
Vietnamese Summer Rolls
I took stock of my wealth of produce, including a hard-as-a rock mango, a fat avocado, Persian cucumbers, a bunch of fresh cilantro and some mint I pulled up from my Community Garden plot. And I decided to make Vietnamese Summer Rolls.
Faithful readers know that my stepdad was a sailor. When my mom married him, he moved us from our crappy hovel in Long Island to a fancy new house (with a garbage disposal, no less) in Virginia Beach. This region of the country, called Tidewater or Hampton Roads, is the epicenter of naval military bases in the Northeastern United States. Almost everyone there (who wasn’t born there) is part of a military family. And a lot of those families are Filipino, ever since the Navy started heavily recruiting them in the 1950s.

So growing up, a lot of my friends were Filipino. I hung out at their houses, watching their Lolas make them hot dog fried rice after school. I learned all the good curse words in Tagalog, and one afternoon, my friend Ben even taught me how to make lumpia, the crispy Filipino spring rolls stuffed with cabbage, carrots and ground beef.
Once I had the technique down, it wasn’t hard to transfer it over from the springy lumpia wrappers to the more delicate rice paper rolls. Ben showed me how to carefully swivel the hard, plastic-like disks of rice paper in a bowl of hot water to soften them, then move them to a board to add the filling and roll them up. (I am fairly confident that mastering this skill led to my infamous joint-rolling finesse.)

I used the skills to make a crunchy batch of Vietnamese Summer Rolls every year—usually to impress my ‘camp friends’ at the Women’s Gathering I’ve been attending every August since I was 19 years old. And when I moved to New York City and was looking for a job to supplement my poverty-insuring career as a journalist, my skills at making spring rolls got me hired to be the Dim Sum Queen of Buddha Bar, a fancy/sleazy nightclub restaurant that used to operate in the Meatpacking District.
Now that I have a wealth of ‘free time’ and am searching for delicious meals that don’t involve a lot of meat products (did you hear about the guy with coronavirus who threw up on the line at the Tyson Foods plant?) these Vietnamese Summer Rolls rose in the ranks. Thanks to my regular forays to Asian supermarkets, I had not one but two sizes of rice paper rolls in the cabinet, waiting to be called into service.

So I gathered everything together and started making my mise en place: the set-up you need when you’re making a complicated dish. I cleaned and picked through the cilantro and mint, pulling apart the leaves and ditching all the stems. I disassembled the greens of several scallions into thin strips. I cut up a Persian cucumber into tiny segments, and sliced up red cabbage super fine.
In the meantime, I cooked some thin rice noodles for the filling. I peeled that hard mango and sliced it into tiny strips. I cut an avocado in half and used a sharp knife to score it into thin half-moons to be teased out with a teaspoon.

I set everything up into the mise en place, got a bamboo board and a bowl of hot water, and the spring roll wrappers. I also tucked a few clean paper towels on the side, to wipe my hands and the board between spring rolls, and I got to work rolling.
Within the hour, I had a full container of Vietnamese Summer Rolls, which I put in the fridge to chill. Then I made the Peanut Dipping Sauce, mixing 1/3 cup of peanut butter with a generous splash of soy sauce, rice vinegar, sambal oelek (Indonesian chile paste), sesame oil, and fish sauce. I added a dash of garlic powder and a glug of hot water to dissolve the peanut butter, and stirred it all up into a savory sauce.

It was a delicious summer dish!
Half Rapscallion, Half Pepperoni
Hey gang! It’s Friday and the whole world is falling apart around us. The leader of the free world is inciting violence on social media and then crybabying when Twitter flags it, saying he’s going to write a law against it. But still no crackdowns on killer cops, still no attempts to regulate guns to stop our long-running epidemic of gun violence.
And forget about justice. Right now, in William Barr’s DOJ, it’s a foreign concept. There’s no justice for anyone except Trump and his cronies, no help for anyone except big corporations who want to be able to pollute more, cut more worker’s safety measures, somehow make even more money, despite dipping into the emergency relief funds without ever having paid any taxes. America is sick, and it’s making all of us sick, too.
We write to our elected officials, we make angry phone calls to District Attorneys, we post about it on Facebook, we protest in the streets. It seems like nothing makes any difference. Who knows what to do anymore?
I sure don’t. So I’m going down the rabbit hole. Tonight, I’ll steep myself in old episodes of Frasier and make a pie for Pizza Friday. Which reminds me of that classic episode, “The Show Where Woody Shows Up.” It’s the one where Frasier is tired of reminiscing about Cheers with Woody, who is visiting friends in Seattle. At least until he catches Woody at a bar, ditching him. He’s also over their trip down memory lane.

But it’s TV, so they make up right away! Frasier invites Woody to join him and his brother Niles for a few drinks, maybe to “have some pizza with a couple of rapscallions.” To which Woody replies, “if you don’t mind, could we make that half rapscallions, half pepperoni?” Oh, Woody. You’re so dumb.
So, enjoy your pizza! Or go crazy. Either way, this whole project of democracy seems to be taking a steep dive off the cliff right now. I can’t see things getting better in our country without some kind of sea change. It’s almost easier to envision Trump locking up anyone who doesn’t agree he’s the second coming. Hope they have pizza in the gulag!
Call me a drama queen, I don’t care. Shut up and eat your pizza. It’s the only good thing that’s left.
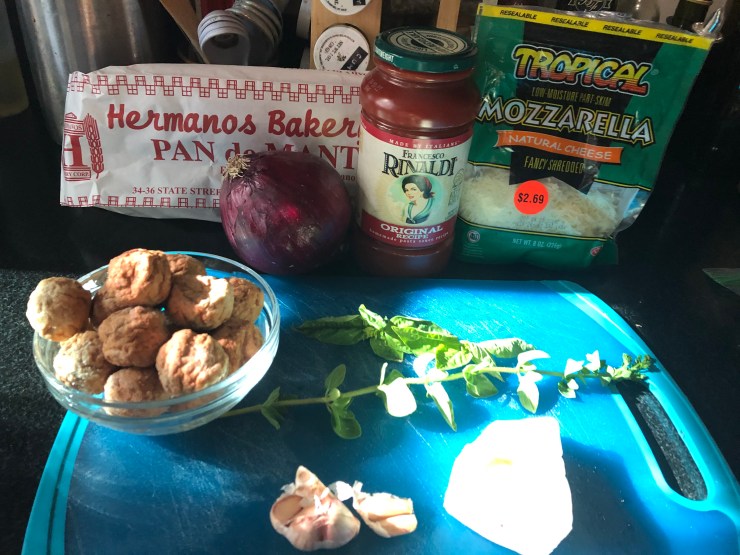
Stuffed Zucchini Blossoms with Costata Romanseco Pasta
Summer’s in full swing, kids, and this weekend our Farmer’s Market had a great deal on big orange zucchini blossoms: $5 for 20. So I snatched them up to make something I’ve never tried at home before: stuffed zucchini blossoms.
Eating flowers? Stuffed with cheese? Sounds crazy! But when I bit into the finished product, I nearly lost my frikin’ mind over how delicious it was! I rushed some over to my friend next door so she could try them while they were still hot, and she liked them so much she couldn’t even leave the compliments in a text; she literally had to call me on the phone to say how good they were.
- INGREDIENTS
- 12-20 Zucchini Blossoms
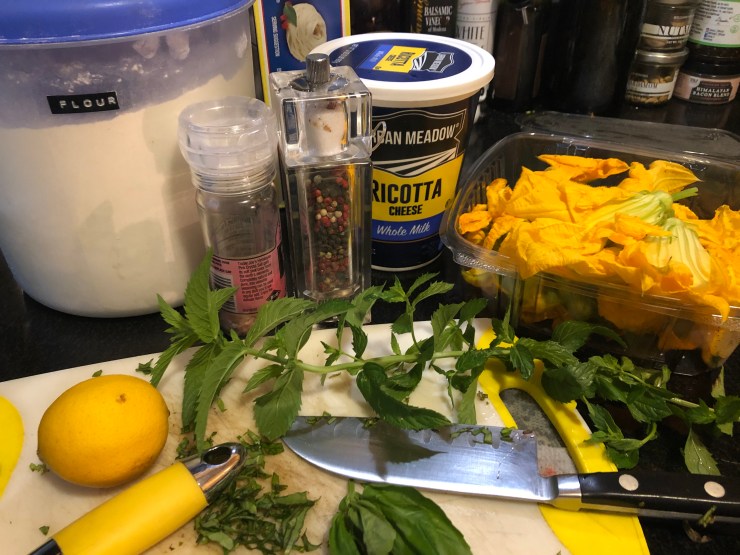
- 1 cup ricotta
- 2 tbps. Chopped mint and basil
- 1 tbsp. lemon zest
- 1 ¼ cup flour
- ¼ tsp. salt
- 12 oz. beer or club soda
- Zucchini or other squash
- Pasta
- Marinara sauce
So let’s make these sonufabitches! They’re easier than you may think. First, sort through your zucchini blossoms. Gently blow into the middle to open them up, and twist out the stamen.
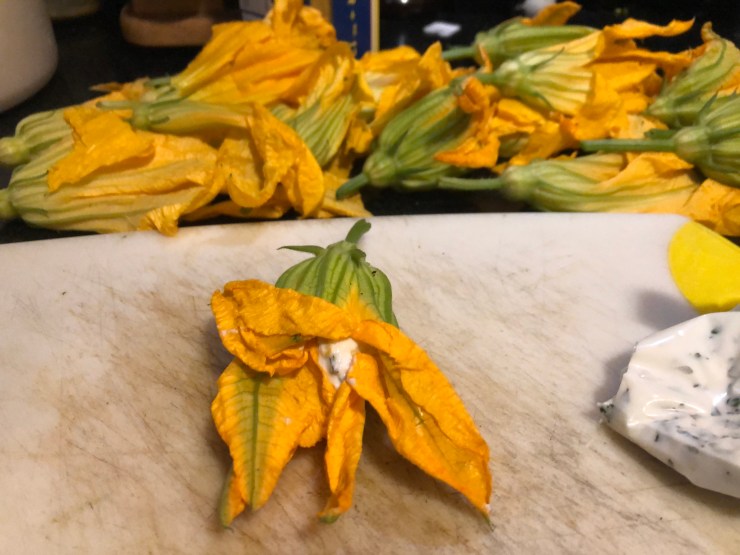

Next, mix your ricotta cheese with the chopped herbs (don’t skimp!), the lemon zest, and some salt and pepper. I put my finished mixture into a Ziploc bag and cut a small hole in the corner to fashion an ersatz piping bag. Then I used one hand to hold the blossom and blow the petals open, while piping about 1 tbsp. of ricotta into the middle. Then, twist the petals together to close the flower up and set it aside carefully.
When all of your flowers are filled, set a pot of boiling salted water on for your pasta, and a frying pan or deep fryer of cooking oil to medium-high to cook the blossoms.
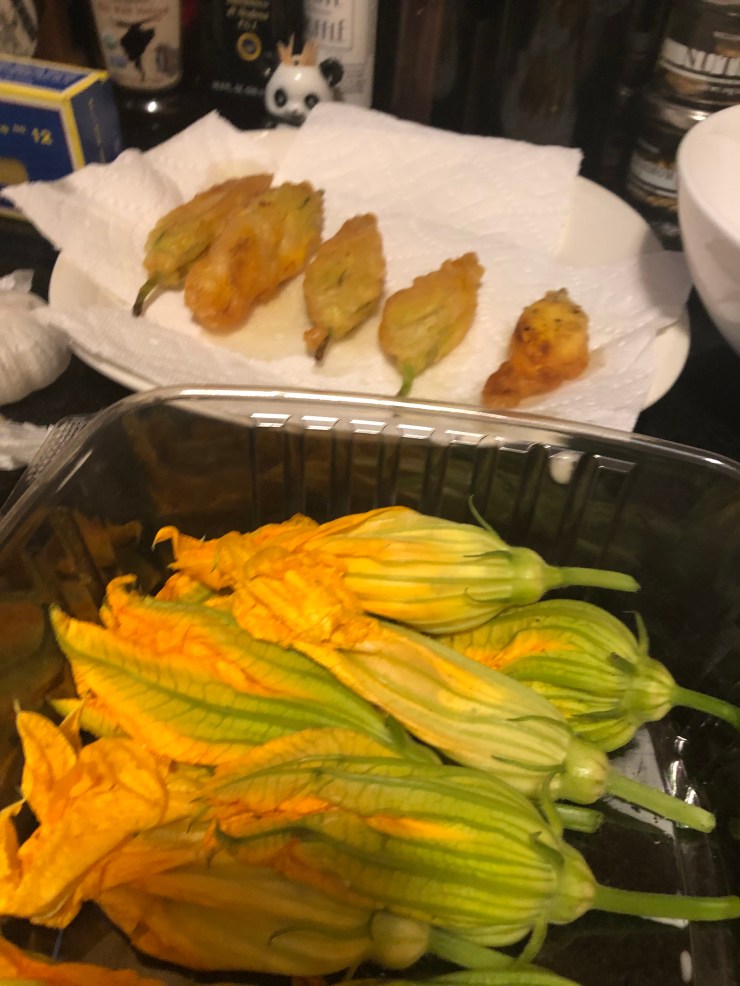
In a large mixing bowl, put your flour, salt, and stir in the beer slowly to make a beer batter. Don’t overmix it; you want it a little lumpy. Begin to dip your filled blossoms into the beer batter, twisting them around to make sure all surfaces are covered with batter. Let some of the mix drip back into the bowl, then carefully place it in your frying pan, being sure not to overcrowd the blossoms.

Turn each one after about 3 minutes, or when they are golden brown, and when the other side is equally cooked, move it to a plate covered with paper towels to drain. Salt them well with sea salt while they’re still hot, then start your next batch. Meanwhile, add your pasta to your boiling pot and cook it to al dente.
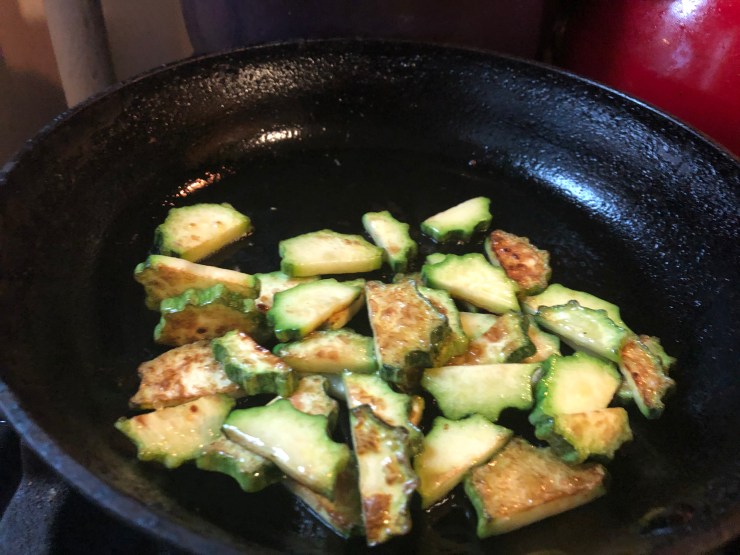
In a second frying pan, begin to sauté your zucchini or Costata Romanseco ridged green squash, which you have cut in rounds. When it’s close to being done, flavor it with some salt and a handful of sliced garlic. When that’s brown, add red sauce to heat it up, then fold in your cooked pasta and coat it well.
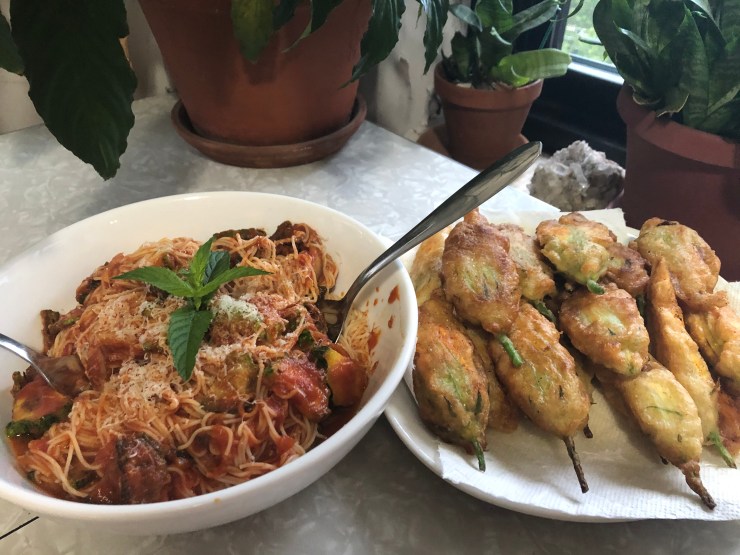
Move your finished pasta to a serving bowl and top with grated Parmesan cheese. Serve with your stuffed zucchini blossoms on a nice platter, and be prepared to be delighted with this glorious dish!
The orange blossoms come through the batter like shreds of cheese, and the mint and basil in the ricotta really pops in the most delightful way! Enjoy, but be sure not to overdo it with the blossoms or you may get heartburn. For future iterations, try stuffing them with prosciutto and mozzarella, or anchovies like real Italians like.
Beef Bulgogi
Back when people used to go places and do things, I went to a Fancy Foods Show at the Jacob Javits Center and got a lot of samples of sauces, marinades, oils, and the like. One of the packets was bulgogi seasoning. At that point in my life, I don’t believe I’d ever had Korean Beef Bulgogi, thin-sliced steak with a spicy seasoning quickly seared and served on a bowl of rice with kimchi, pickles, herbs, radishes and the like.
Since that time, I have been to restaurants in Koreatown and have enjoyed dishes similar to beef bulgogi, served with all the little bowls of things that they call banchan. I love tiny bowls of things, so this was an instant winner for me.

Well now that I’m stuck in my house and running out of different things to do with my food, I’ve struck out on the Interwebs to see what else I could cook. I found that packet of bulgogi seasoning, as well as a container of frozen stew meat. When my awesome neighbors offered me a big jar of fresh, homemade kimchi, I knew it was time to give bulgogi a try.
- INGREDIENTS
- 6 oz. Beef skirt or flank steak
- 1 cup Sushi Rice
- Bulgogi Seasoning: soy sauce, sugar, garlic, scallion, sesame seeds & oil, pepper
- Lettuce leaves
- 2 Radishes
- 2 Scallions
- Kim chee
- Sambal Oelek
- Mint & Cilantro
- Persian cucumbers
So I took the meat out of the freezer and moved it to the fridge for a few hours. Just as a note, flank steak or hangar steak probably works best, but as long as you slice it super thin, almost any kind of steak will work fine. Before my steak was thawed, I took it out and sliced it, still frozen, into thin strips of meat. I coated each piece of meat with the bulgogi seasoning, and put it back in the fridge to slowly thaw. If you don’t have the packet of seasoning, you can make your own with soy sauce, sugar, garlic, scallion, sesame seeds and oil, and ground pepper.

In the meantime, I prepared the banchan side dishes. I cleaned cilantro and mint, plus red lettuce leaves, so we could wrap the meat in it like little tacos. I pulled out the kitchen mandolin and sliced cucumbers waffle-fry style, and quick pickled them.
I sliced up three different types of radishes paper thin, and peeled and sliced thin strips of ginger from a huge knob that those same awesome neighbors also gave me. I cleaned and cut several scallions with my kitchen shears.
I made a nice pot of jasmine rice, and while it was cooking, put all the banchan on the kitchen table along with sriracha sauce, sesame oil, and sambal oelek, a hot chili paste. The big jar of kimchi went right in the middle of the table.

When there was only 10 minutes left for the rice to finish, I put a large frying pan on the heat with a little oil. While it was heating up, I made myself a cute complimentary cocktail with Bombay Dry Gin, tamarind soda and a sprig of mint.
Then I got to work with the meat. Once the pan was really hot, I tossed it all in and just kept it moving. I made sure each side of each piece was nicely seared, then tossed some black and white sesame seeds on it, put it on a platter and served it up. The rice went in another bowl. We each set about constructing our own personal bowl of bulgogi with our own seasonings to our own taste.

They say a picture is worth a thousand words, and so I guess the end result speaks for itself. This dish was spicy, tasty, beefy, beautiful, healthy, and delicious. I’m super proud and kind of amazed that it worked so well. I encourage everyone to cook outside their comfort zone. Because if you’re not going to try it now, when you’ve got all the time in the world and not much pressing competition to get to anything else, then when will? Go for it!
Be safe, eat well, and every once in a while, take a chance!
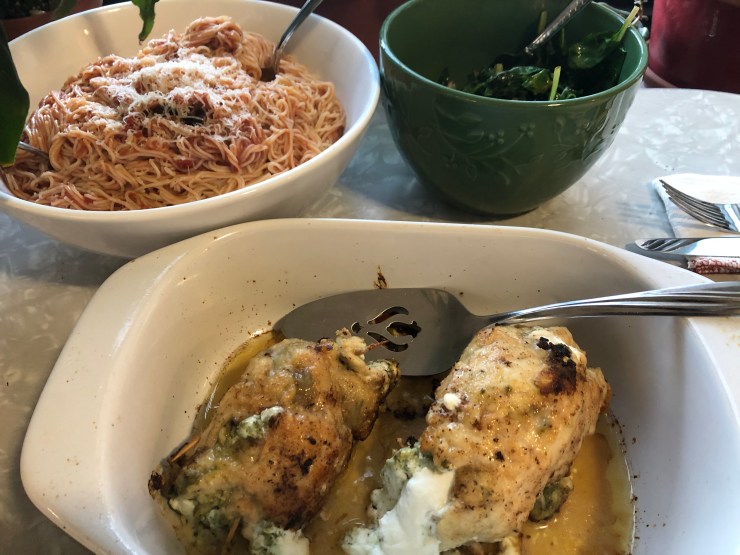
Pesto Ricotta Stuffed Chicken Breasts
“Use it or lose it,” goes the old adage. And this summer, as the pandemic rages on across the world, it’s never rang truer. Home cooks like me are being especially frugal with our existing ingredients, loathe to waste anything. For example, when the radishes in my community garden went to seed, I picked the pods and pickled them to eat as a cocktail snack. And I took the radish greens and processed them into a bright, peppery pesto. But since I usually just toss these greens, I didn’t really know what to use the radish green pesto for.
Until one morning when I was lazing around the bedroom watching our non-cable TV with all the weird channels featuring crafting and cooking shows. Chef Lidia Bastianich was on Create TV whipping up some of her Italian specialties. She laid out a chicken cutlet between a couple of pieces of plastic wrap and pounded them out until they were paper (or at least cardboard) thin.

Then she put a spoonful of ricotta cheese mixed with salt and pepper, herbs and an egg, followed by a spoonful of basil pesto. She rolled up the chicken, securing it with toothpicks on each side, and dredged it in flour. Then she browned each rolled chicken cutlet until it was brown and moved it to a Pyrex dish.
She put them into a 350 oven to finish up, and when she cut into the chicken, you could clearly see the white of the cheese contrasted with the bright green of the pesto. It looked magnificent!
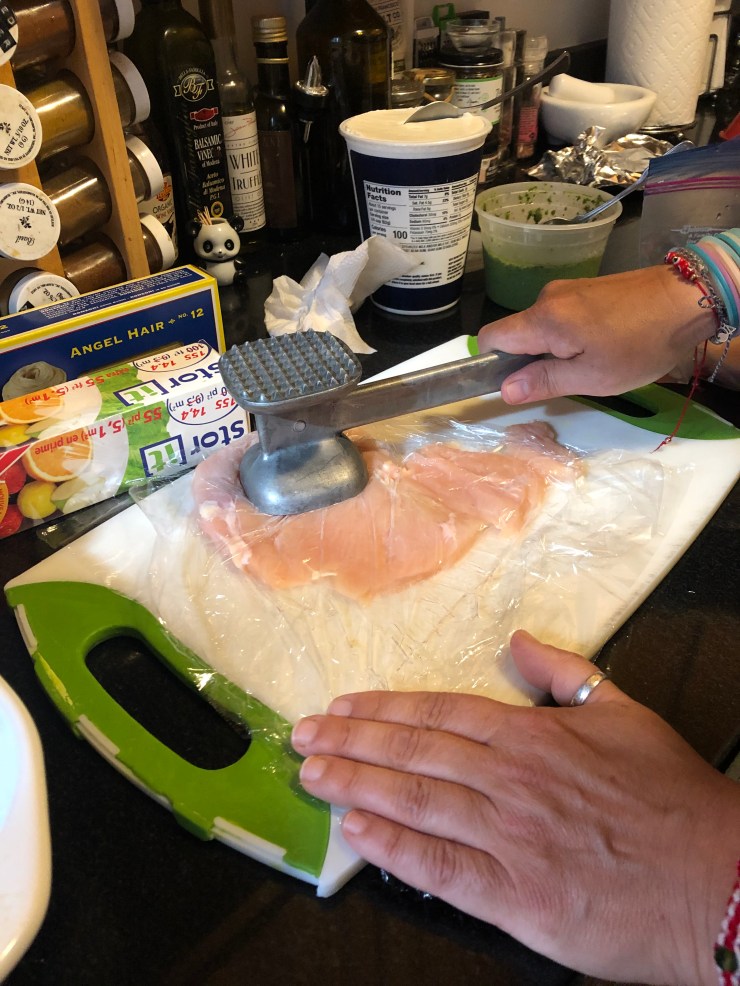
So I decided that if it was good enough for public television, it was good enough for me. I got out my chicken cutlets and my meat tenderizer, and worked out my aggression by pounding out the meat. But don’t go all psycho killer on it! What you’re trying to do is to work from the middle to the edges, thinning out the cutlet without breaking the meat. You don’t want to end up with a bunch of broken-up bits and pieces.
- INGREDIENTS
- 2 Chicken breasts
- 1/2 cup Ricotta
- Herbs (oregano, mint, thyme)
- 1/2 cup Flour
- 1/2 cup Pesto
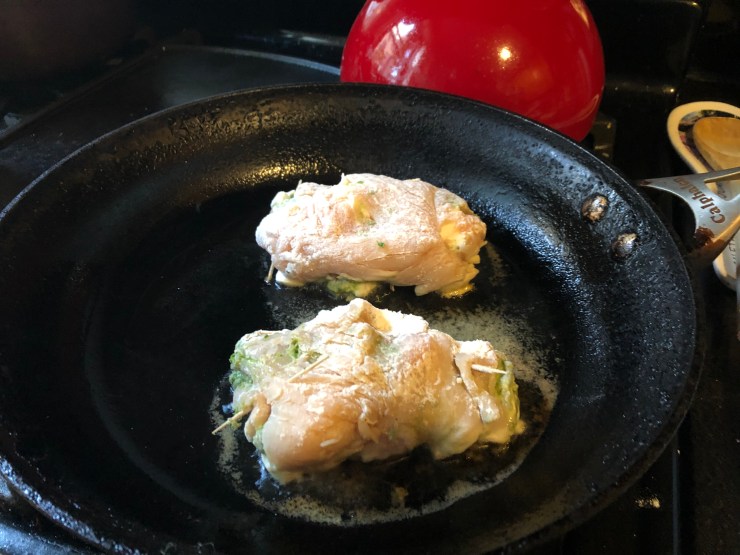
Put about a tablespoon each of your seasoned ricotta cheese (you won’t need much, so plan on making stuffed shells or something with the rest of the ricotta) and whatever pesto you’re using in the middle, then roll it up from the bottom, tucking both ends in before completing the roll. Use toothpicks to hold everything in place. Roll each chicken portion in flour and ease gently into a hot skillet. Turn once after about 4 minutes and cook the other side. Move them into an oven-safe casserole dish and be sure to remove the toothpicks. You don’t want to bite into pointy wooden pieces!
Pop the chicken into the oven to finish cooking, and make a simple batch of pasta with red sauce to serve with the chicken. I also sautéed a bunch of fresh Swiss chard from my garden with sliced garlic as a side dish, and it provided just the right sharp, biting contrast to the savory, cheesy chicken.
Pasta is a perpetual family pleaser, and chicken cutlets aren’t going to break the bank, either. Not to mention almost everyone has a few of these floating around in the back of the freezer, just in case a trip to the grocery store is more trouble than it’s worth.
So there you have it! A dish good enough for one of the nation’s top chefs, but simple enough that you can successfully cook it in your own home kitchen. Thanks to Lidia for the inspiration, and as she would say, “Everyone to the table to eat!” Except she would say it in Italian, and probably sue me for copyright infringement if I did, as well. Enjoy!
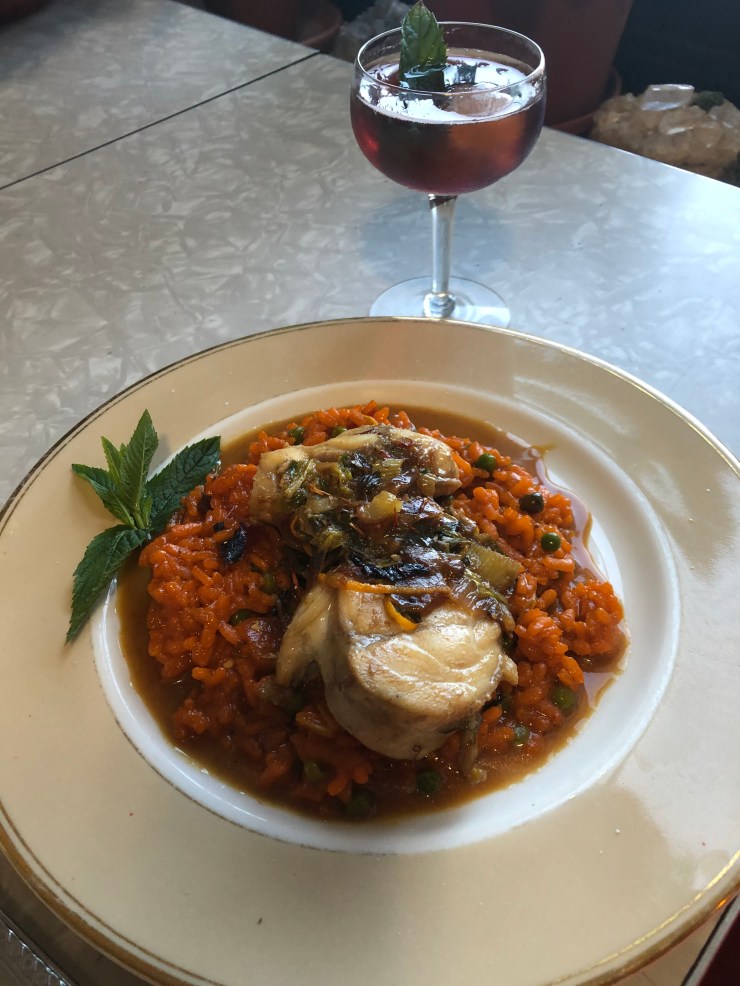
Monkfish Saffron Risotto
Welcome to my new blog, Brooklyn is Cookin’. Longtime readers may recall that I had a blog of the same name once upon a time on Blogspot. Well, I have revived it and given it new life as a part of my domain, winniemccroy.com.
Check here every weekday for a new recipe that speaks to my deep love of farmhouse cooking with minimum waste, showcasing fresh garden and Farmer’s Market items and celebrating the food of many cultures, especially Pan-Asian influences.


Today’s recipe will be Monkfish Saffron Risotto. Risotto is a tough sell. Folks who can’t cook much at all will treat it like rice, and serve you up a dish of paste. Middling cooks will avoid it altogether. But a good cook isn’t going to be afraid of risotto! Especially when you understand that to make risotto a success, all you need is the patience to add just a little of the liquid at a time, and stir it often.
- INGREDIENTS
- 1 cup Arborio Rice
- Monkfish
- 1 tbsp. saffron
- 4 cups of chicken or fish stock
- 1 rib celery
- 1 Shallot
- 1 Orange
- Herbs like thyme, oregano or dill
- 1/4 cup capers and/or green peas
- 1/2 stick of butter
So let’s start by gathering up our ingredients. Root around in your kitchen for some celery, a shallot, an orange, saffron, chicken or fish stock, wild onions, herbs like thyme, oregano or dill, capers and/or green peas, butter, Arborio rice and a nice piece of monkfish, about 5 oz. for two people. Monkfish is a scary monster of a fish and all the meat comes from the tail. If you get a large portion of monkfish, feel free to cut off two portions for a straight-up seafood dinner, and save the smaller tail portion for this risotto. Because I am all about thrifty and delicious cooking!

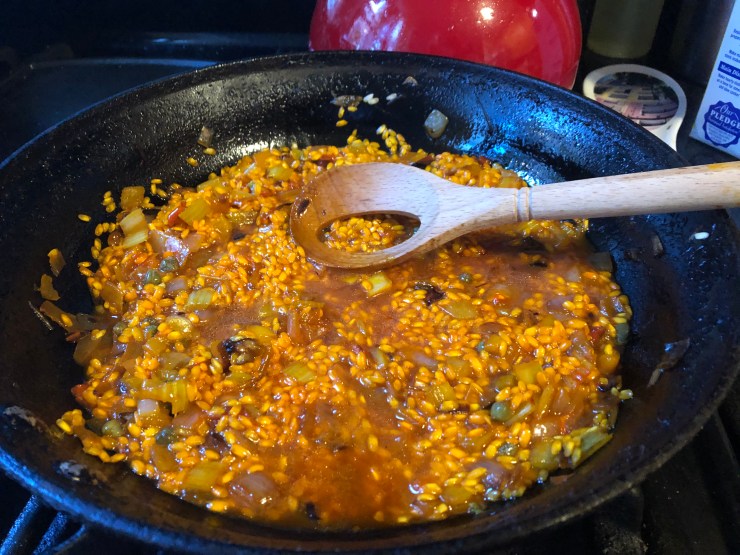
Start by heating a large cooking pan with olive oil. Sauté diced shallots and sliced celery in your pan until the onions are translucent. Add a tablespoon of butter and when it’s melted, add your Arborio rice to the pan—a portion for each person eating the meal. Cook the rice until it begins to brown, moving it around often. Deglaze it quickly with a dash of white wine if you like, then begin to add your chicken stock, ½ a cup at a time.
Use a wooden spoon to stir your risotto (I use this special risotto spoon with a hole in the middle, so it doesn’t break the grains of rice as they cook). Whenever the liquid boils away, it’s time to add another ½ cup of stock and stir it well. Repeat this process until the entire box of stock is used up. Taste your risotto to make sure it’s tender. Add the peas and capers at the very end, then gently stir in a teaspoon of ground saffron, and/or some threads of fresh saffron, more pricey than gold.
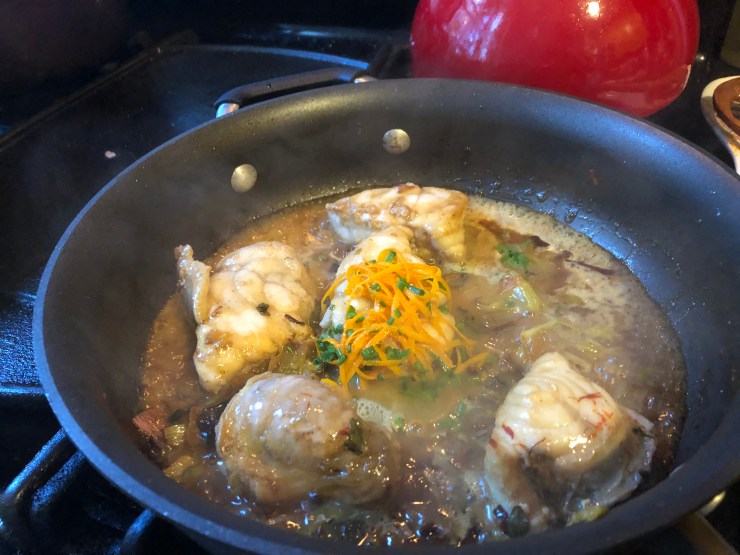
In the meantime, let’s prepare our monkfish. This is a nice white fish with the taste and consistency of lobster. Except in order to get to it, you first have to remove a fishy grey membrane that surrounds the fish. The easiest way to do this is to slip a sharp knife under the membrane, then work your fingers between the membrane and the meat and strip it off. Remove as much as possible without damaging the fish. Then, slice it into medallions (rounds).
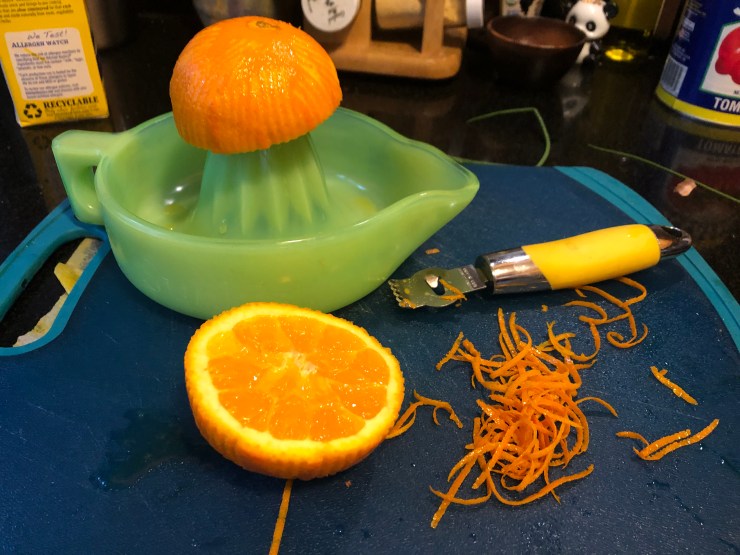
In another pan, melt a tablespoon of butter. Carefully ease your monkfish into the pan and braise it in butter. While it’s cooking, zest the peel from one orange, then cut it open and juice the inside. Turn your monkfish medallions over and cook for three more minutes, then add the herbs, orange zest and orange juice. If you like, feel free to add a few more threads of saffron. Your fish is done when you touch it and your finger doesn’t make a dent. Try not to overcook seafood!

Once both the risotto and the fish are done cooking, it’s time to plate them. Put a nice portion of risotto in the center of your plate or bowl. Add a few medallions of monkfish, and sprinkle some finishing salt on the whole thing. Garnish and bring it to the table. I served mine with a Sazarac cocktail.
Monkfish is a sustainable seafood, and there are many things you can do with this ‘poor man’s lobster,’ as they call it. So do yourself a favor and eat more fish! It’s a great protein that has numerous recipe possibilities, especially now that it’s summer. Check future blog posts for other delicious seafood recipes, like Shrimp Pad Thai.
Enjoy, my friends!
Southern Fried Chicken
I was a weird kid. Which tracks, since I’m now a weird adult. And I’ve always been into cooking. But right about when I was 12 years old and a fairly recent transplant to the South, I became obsessed with fried chicken and biscuits.
My mom worked long hours and my stepdad was often deployed for months at a time, drifting around at the bottom of the ocean on his sub. So when dinnertime came, it was the kids job to make it. So my foray into perfecting Southern-style fried chicken was welcomed. Mom had a square electric skillet, and a freezer full of cheap commissary chicken.

So I made chicken, two or three times a week. I tried out different coatings, and various herbs and spices. I made biscuits, too, but baking is different than cooking and they never went beyond just okay. But after many attempts, my fried chicken eventually moved from good to epic. And you don’t have to trust me; it’s so addictively good, they added it to the catering menu at a restaurant I worked at once upon a time.
In the beginning, I used only flour and egg when I made fried chicken. Sometimes I even double-dipped it between the egg and flour. More recently, I have been known to soak the chicken pieces in buttermilk for a day before I dredge them through the flour. Either way is great, it just depends on how thick you want your crust to be. For this batch, I didn’t feel like I could spare eggs, buttermilk, or even regular milk. So I didn’t use a damn thing! I just put the chicken straight into the flour.
Before I go into the particulars, I’ll tell you about the side dishes. Sides are important when you have chicken, and there are many suitable ones. You can do mac ‘n cheese, potato salad, macaroni salad, biscuits, dirty rice, corn, green beans, black-eyed peas, cornbread, or coleslaw.

I had leftover jambalaya, so I reheated that. I was going to make biscuits, but I had lots of fresh-made bread already, so I just heated that up and served it with that nice Ramp Butter I made last week. And I paired it all with some nice red cabbage coleslaw. I just grated it up with some onion and carrots, and tossed in some mayonnaise, lemon juice, cider vinegar, and salt and pepper.
- INGREDIENTS
- Chicken pieces
- 1 cup flour
- Herbs & spices plus Old Bay Seasoning
- 1 cup Buttermilk
- Cooking oil
- Sides of your choice
So back to the main event. This is how you do it: first, get your chicken together. Soak it in buttermilk, or just don’t. If you have around six or eight pieces, put a cup of flour into a paper bag—that should be enough to cover it all without wasting flour (because you really shouldn’t try to reuse the coating on something if you put raw food into it the first time).
Then, you add your spices to the bag. Start with a good tablespoon or so of salt; about a center of a palm full should do it. Add a teaspoon or so of each of the following: some nice black pepper, onion powder, oregano, chili, turmeric, paprika, cumin, and the tiniest dash of cinnamon. Then, add a heaping tablespoon of my secret ingredient: Old Bay Seasoning. The Chesapeake Bay folks will show you how fried chicken should be done!
Shake all the herbs up in the bag. Heat up a large skillet full of vegetable oil (or lard, if you play that game), and started coating your chicken, one or two pieces at a time. Don’t shake that leg in the bag until you are ready to cook it! Place each piece carefully into the medium-hot oil and leave it there for the time being. Don’t touch or move it for five minutes at least. Then, carefully turn it with your tongs.

If the chicken pieces are small, they will cook through in the pan. If not, you’ll need to brown them to your desired shade in the pan, then move them to a cookie sheet covered with foil and finish them in a 350 degree oven until the juices run clear. You don’t want to find your chicken red at the bone, because you might get sick that way.
So cook them up well, and make your family really happy with this delicious Southern Fried Chicken. Get it right and you’ll end up putting Popeye’s out of business.
Steak & Martinis
Hey friends! Sometimes, when it feels like everything is shit and getting worse by the minute, you just have to dig into the freezer and pull out the last of the steaks. Cause I’m not getting gunned down by armed militia members and hitting the bricks for the big sleep on a belly full of tofu. Not today, Satan.
So I thawed a couple of ribeyes and dry-rub marinaded them in Montreal Steak Seasoning for a few hours. I cooked them fast and hot, and delglazed the pan with a little wine to make a light sauce. I even carved off two coins of ramp butter and put one on top of each steak, for ultimate flavor.

I boiled the last of the tiny potatoes and served them up with a nice drizzle of White Truffle Oil, and served them up in a cute green bowl. I got another bowl from the set to serve up our side dish of green beans.
- INGREDIENTS
- 2 Steaks
- 2 cups green beans
- 2 cups red potatoes
- 3 cloves garlic
- Green salad of your choice
I thin-sliced three cloves of garlic and sautéed them, then cooked up some Trader Joe’s frozen haricots verts, and topped them with crunchy onions. Not satisfied with meat and two sides, I made a couple of cute side salads with fresh-picked Deer Tongue lettuce and Romaine, plus Persian cucumbers and grape tomatoes. I added bleu cheese and Roka bleu dressing to my salad bowl, because that’s how I roll.
To wash it down, I mixed up a shaker full of super-cold Gibson Ramp Martinis. It’s a gin martini that’s two parts gin, and half each of vermouth and the pickling agent. The ramps I pickled had a bit of time to mellow since I last used them, and they had turned pink. They looked awesome in the coupe, which was super cold and lovely.

My wife referred to the martini as “a bracing slap in the face.” After which she surreptitiously poured hers back into the shaker. So I drank them all myself. Lots and lots of slaps in the face, all for me.
But it got my mind off the pain of our nation in the face of overarching racism and an oppressive lack of justice for a few hours. So chalk one up for the booze.

Be safe, friends, and don’t be afraid to go all in. Who knows when this whole thing will go tits-up and a night of steaks and martinis will be the stuff of old movies? They say heaven is forever, but I’m going to get mine here on earth.
